Easy Bread Slice Sugar Cookies – Fun Back to School Snack Idea!
Introduction
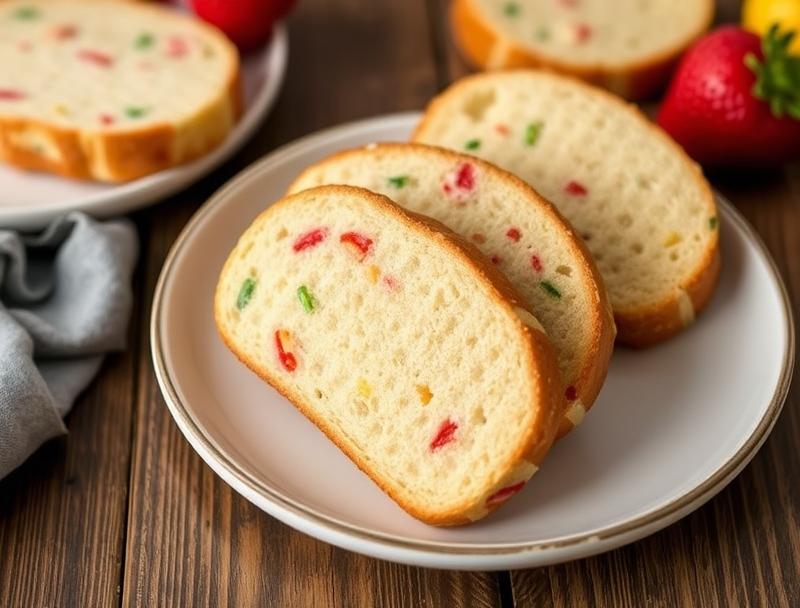
As the back-to-school season approaches, finding fun and easy snack ideas that kids will love can be a challenge. One creative solution is to transform ordinary bread slices into delicious sugar cookies. This innovative recipe, Easy Bread Slice Sugar Cookies, is not only a breeze to make but also offers a unique twist on traditional cookie recipes. By utilizing everyday ingredients and simplicity in preparation, these cookies are perfect for a quick after-school treat or as a special surprise in lunchboxes. The best part? They’re incredibly easy to customize with your child’s favorite colors or decorations, making them a great activity for quality time in the kitchen.
Why This Works
- Flavor balance and ingredient accessibility: The combination of sugar, butter, and vanilla on toasted bread provides a surprisingly balanced and delightful flavor profile, all while using ingredients that are likely already in your pantry.
- Ease of preparation: The simplicity of this recipe makes it accessible to anyone, regardless of baking experience. It requires minimal ingredients and effort, perfect for a spontaneous baking session with kids.
- Impressive results with minimal effort: Despite the ease of preparation, the end result is impressive and delicious, making it a great option for school events, parties, or as a gift for teachers.
Ingredients
- 4 slices of white bread
- 1/2 cup granulated sugar
- 1/4 cup unsalted butter, softened
- 1 teaspoon vanilla extract
- Colored sprinkles or other decorations (optional)
- Pinch of salt
Instructions
- Step 1: Preheat your oven to 350°F (180°C). Line a baking sheet with parchment paper to ensure easy cleanup and to prevent the bread from sticking.
- Step 2: Lay the bread slices on the prepared baking sheet. Toast the bread in the oven for about 5 minutes, or until it’s lightly browned and crisp. This step is crucial for achieving the right texture.
- Step 3: While the bread is toasting, mix the softened butter, granulated sugar, vanilla extract, and a pinch of salt in a bowl until you get a smooth, creamy paste.
- Step 4: Remove the toasted bread from the oven and let it cool for a minute or two. Then, spread the sugar and butter mixture evenly onto each bread slice. If desired, top with colored sprinkles or other decorations before the mixture hardens.
- Step 5: Allow the cookies to cool completely on the baking sheet. Once cooled, they’re ready to serve or can be stored in an airtight container for later.
Handy Tips
- For an extra crunchy cookie, you can broil the bread slices for an additional 30 seconds to 1 minute after toasting, but keep a close eye to prevent burning.
- Consider using different types of bread, like whole wheat or sourdough, for a unique twist in flavor and texture.
- If you’re planning to make these cookies with kids, prepare the sugar and butter mixture ahead of time and let them decorate the cookies with sprinkles or other toppings.
Heat Control
When toasting the bread, keep an eye on it to ensure it doesn’t burn. The ideal color is a light golden brown. If you choose to broil the bread for extra crunch, monitor it closely as the transition from perfectly toasted to burnt can happen quickly.
Crunch Factor
The crunch of these cookies comes from the toasted bread. To achieve the perfect crunch, don’t overbake the bread. A light toast that still yields to pressure is ideal. If you prefer a softer cookie, bake the bread for a shorter time or skip the broiling step.
Pro Kitchen Tricks
- For easier spreading, make sure the butter is at room temperature. If you’re in a hurry, you can soften the butter in the microwave in 10-second increments, checking until it’s softened but not melted.
- Experiment with different extracts like almond or lemon to give your cookies a unique flavor profile.
Storage Tips
- Store the cookies in an airtight container at room temperature for up to 3 days. They can also be frozen for up to 2 months. When freezing, place the cookies in a single layer in a freezer-safe bag or container to prevent them from sticking together.
- For the best flavor and texture, consume the cookies within a day or two of making them.
Gift Packaging Ideas
These cookies make great gifts for teachers, friends, or family members. Consider packaging them in decorative jars, wrap them individually in cellophane bags and tie with a ribbon, or place them in a gift tin. Adding a personal note or a decorative touch can make the gift even more special.
Flavor Variations
- Different spices: Try adding a pinch of cinnamon, nutmeg, or cardamom to the sugar and butter mixture for a unique flavor twist.
- Creative toppings: In addition to sprinkles, consider using chopped nuts, shredded coconut, or even candy pieces to decorate your cookies.
- Ingredient swaps: For a dairy-free version, you can substitute the butter with a vegan alternative. Similarly, you can use different types of sugar or honey for a slightly different flavor.
Troubleshooting
- Texture problems: If your cookies turn out too hard, it might be because the bread was over-toasted. Conversely, if they’re too soft, the bread might not have been toasted enough.
- Ingredient replacements: Always try to use the ingredients listed for the best results. However, if you need to make substitutions, ensure they’re as close to the original ingredients as possible in terms of flavor and texture.
- Over/undercooking signs: Keep an eye on your cookies while they’re baking. Overcooked cookies will be dark brown and possibly burnt, while undercooked ones might be too pale and soft.
FAQs
- Can I freeze it? Yes, you can freeze the cookies for up to 2 months. Just ensure they’re stored properly to maintain their texture and flavor.
- Is it gluten-free? The recipe uses traditional wheat bread, so it’s not gluten-free. However, you can experiment with gluten-free bread as a substitute.
- Can I double the recipe? Absolutely! Simply double all the ingredients. You might need to adjust the baking time slightly, depending on how your oven performs with a larger batch.
Conclusion
Making Easy Bread Slice Sugar Cookies is a fun and rewarding experience, especially when shared with kids. The process is simple, the ingredients are readily available, and the result is a delicious treat that’s perfect for any occasion. Don’t hesitate to experiment with different flavors and decorations to make the recipe your own. Whether you’re a seasoned baker or a beginner in the kitchen, this recipe is sure to bring smiles and satisfaction. So, go ahead, get baking, and enjoy the joy of sharing something homemade and special with those around you.
Easy Bread Slice Sugar Cookies – Fun Back to School Snack Idea!
A simple and fun recipe to transform bread slices into delicious sugar cookies, perfect for back-to-school snacks or any occasion.
🥘 Ingredients
👩🍳 Instructions
-
1Preheat the oven to 350°F (180°C).
-
2Toast the bread slices in the oven for about 5 minutes, or until lightly browned.
-
3Mix the softened butter, granulated sugar, vanilla extract, and a pinch of salt in a bowl until smooth.
-
4Spread the sugar and butter mixture onto each toasted bread slice.
-
5Allow the cookies to cool completely before serving or storing.
-
6Optional: Decorate with colored sprinkles or other toppings before the mixture hardens.