Festive Patriotic Mini Cheesecakes Recipe
Introduction
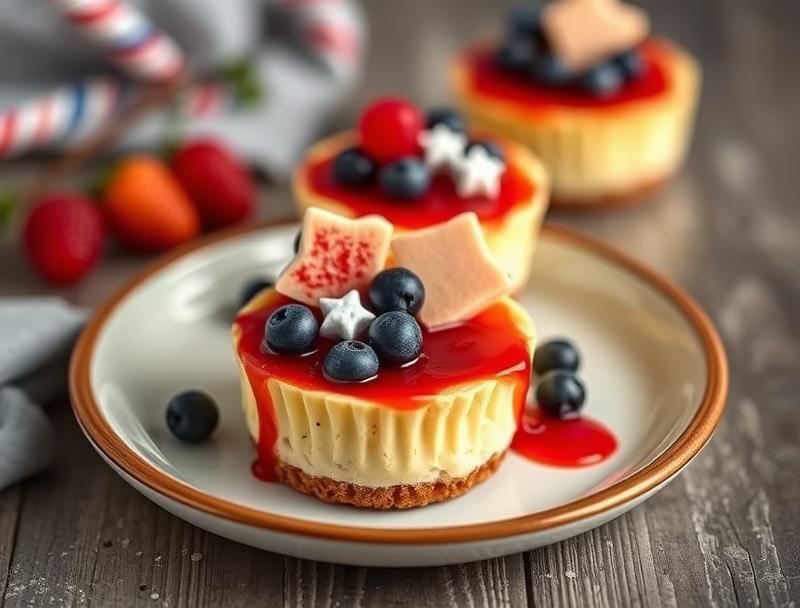
As we approach the festive season, there’s no better way to celebrate than with a dessert that embodies the spirit of patriotism. These Festive Patriotic Mini Cheesecakes are not only deliciously creamy and rich, but they’re also incredibly easy to make and require minimal effort. Using everyday ingredients, you can create a show-stopping dessert that’s perfect for any patriotic celebration. With their vibrant red, white, and blue colors, these mini cheesecakes are sure to be a hit at your next gathering. So, let’s dive into the world of patriotic desserts and explore the magic of these bite-sized treats.
Why This Works
- Flavor balance and ingredient accessibility: The combination of cream cheese, sugar, eggs, and vanilla extract creates a perfectly balanced flavor profile that’s both tangy and sweet. Plus, all the ingredients are easily accessible at your local grocery store.
- Ease of preparation: These mini cheesecakes are a breeze to prepare, requiring only a few simple steps and minimal cooking time. The hardest part is waiting for them to chill in the fridge!
- Impressive results with minimal effort: Despite their ease of preparation, these mini cheesecakes look and taste like they were made by a professional pastry chef. The vibrant colors and perfectly rounded shapes make them a stunning addition to any dessert table.
Ingredients
- 1 1/2 cups graham cracker crumbs
- 1/4 cup granulated sugar
- 1/2 cup unsalted butter, melted
- 12 ounces cream cheese, softened
- 1/2 cup granulated sugar
- 2 large eggs
- 1 teaspoon vanilla extract
- 1 cup sour cream
- Red, white, and blue sprinkles or food coloring
Instructions
- Step 1: Preheat your oven to 325°F (160°C). Line a mini muffin tin with paper liners.
- Step 2: In a medium bowl, mix together the graham cracker crumbs, sugar, and melted butter until well combined. Press about 1 tablespoon of the mixture into the bottom of each mini muffin cup.
- Step 3: In a large bowl, beat the cream cheese until smooth. Add the granulated sugar, eggs, and vanilla extract, and mix until well combined.
- Step 4: Divide the cheesecake batter evenly among the mini muffin cups. Bake for 15-18 minutes, or until the edges are set and the centers are just slightly jiggly.
- Step 5: Allow the mini cheesecakes to cool completely in the pan. Once cooled, refrigerate for at least 4 hours or overnight.
- Step 6: Just before serving, top each mini cheesecake with a dollop of sour cream and a sprinkle of red, white, and blue sprinkles or a few drops of food coloring.
Handy Tips
- Make sure to use room temperature ingredients, especially the cream cheese, to ensure a smooth and creamy batter.
- Don’t overmix the batter, as this can cause the cheesecakes to crack or become tough.
- If you’re using food coloring, start with a small amount and add more as needed, as the color can quickly become too intense.
Heat Control
When baking the mini cheesecakes, it’s essential to keep an eye on the temperature and timing. The ideal temperature is 325°F (160°C), and the cheesecakes should be baked for 15-18 minutes, or until the edges are set and the centers are just slightly jiggly. If you’re unsure, it’s always better to err on the side of caution and bake for a few minutes less, as overbaking can cause the cheesecakes to dry out.
Crunch Factor
The graham cracker crust provides a lovely crunch to the mini cheesecakes, which complements the creamy cheesecake filling perfectly. To ensure the crust stays crunchy, make sure to bake it for the full 5-7 minutes, or until it’s lightly browned and set.
Pro Kitchen Tricks
- Use a water bath to bake the mini cheesecakes, as this will help them cook more evenly and prevent cracking.
- Don’t open the oven door during the baking time, as this can cause the cheesecakes to sink or crack.
- Let the mini cheesecakes cool completely in the pan before refrigerating them, as this will help them set and make them easier to handle.
Storage Tips
- Store the mini cheesecakes in an airtight container in the refrigerator for up to 5 days.
- Freeze the mini cheesecakes for up to 2 months, and thaw overnight in the refrigerator before serving.
- When storing, make sure to keep the mini cheesecakes away from strong-smelling foods, as they can absorb odors easily.
Gift Packaging Ideas
These mini cheesecakes are perfect for gifting, especially during the festive season. Consider packaging them in small gift boxes or bags, tied with a ribbon and a gift tag. You could also add a few extra touches, such as a sprinkle of red, white, and blue sprinkles or a small American flag pick.
Flavor Variations
- Try adding a few drops of strawberry or raspberry extract to the cheesecake batter for a fruity twist.
- Use different types of sprinkles or food coloring to create a unique and personalized look.
- Add a few chocolate chips or shavings to the cheesecake batter for a chocolatey surprise.
Troubleshooting
- Cracked cheesecakes: This can be caused by overbaking or sudden temperature changes. To prevent cracking, make sure to bake the cheesecakes at the correct temperature and avoid opening the oven door during the baking time.
- Too dense or dry cheesecakes: This can be caused by overmixing the batter or using too much flour. To prevent this, make sure to mix the batter just until combined and use the correct amount of flour.
- Cheesecakes that don’t set: This can be caused by underbaking or using too much liquid in the batter. To prevent this, make sure to bake the cheesecakes for the full 15-18 minutes and use the correct amount of liquid in the batter.
FAQs
- Can I freeze the mini cheesecakes? Yes, you can freeze the mini cheesecakes for up to 2 months. Simply place them in an airtight container or freezer bag and thaw overnight in the refrigerator before serving.
- Are the mini cheesecakes gluten-free? No, the mini cheesecakes contain graham cracker crumbs, which contain gluten. However, you can substitute the graham cracker crumbs with a gluten-free alternative, such as almond flour or coconut flour.
- Can I double the recipe? Yes, you can double the recipe to make more mini cheesecakes. Simply multiply all the ingredients by two and follow the same instructions.
Conclusion
These Festive Patriotic Mini Cheesecakes are the perfect dessert for any patriotic celebration. With their vibrant red, white, and blue colors and creamy cheesecake filling, they’re sure to be a hit with your friends and family. So why not give them a try and add a little patriotism to your dessert table? Remember to follow the tips and tricks outlined in this recipe, and don’t hesitate to experiment with different flavor variations and gift packaging ideas. Happy baking!