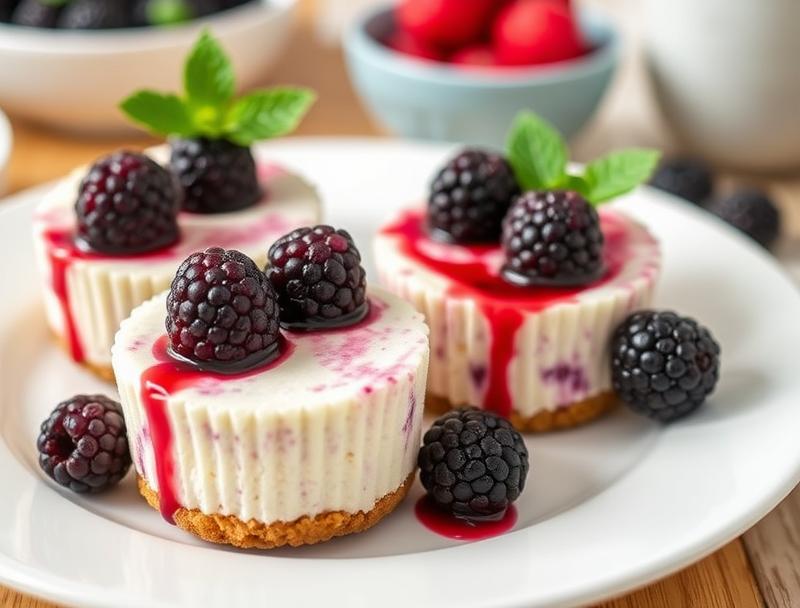
No-Bake Mini Blackberry Cheesecakes
Introduction
No-bake desserts are a game-changer for anyone looking for a quick, delicious, and creative treat that doesn’t require hours of cooking. The No-Bake Mini Blackberry Cheesecakes are a perfect example of such a dessert, combining the richness of cheesecake with the sweetness of blackberries, all in a bite-sized package. This recipe is ideal for those who want to impress with minimal effort, using everyday ingredients to create something truly special. Whether you’re a seasoned baker or a beginner in the kitchen, these cheesecakes are sure to delight with their ease of preparation, stunning presentation, and, of course, irresistible flavor.
Why This Works
- Flavor balance and ingredient accessibility: The combination of a creamy cheesecake base, the natural sweetness of blackberries, and a crunchy graham cracker crust is not only delicious but also easily achievable with commonly found ingredients.
- Ease of preparation: The no-bake aspect of this recipe makes it incredibly straightforward. There’s no need to worry about baking times or temperatures, making it perfect for those new to dessert making or looking for a hassle-free treat.
- Impressive results with minimal effort: Despite the simplicity of the recipe, the end result is impressive. The mini cheesecakes are perfect for gatherings, parties, or as a special dessert for a family dinner, offering a professional-looking dessert without the professional skill level.
Ingredients
- 1 1/2 cups graham cracker crumbs
- 1/4 cup granulated sugar
- 1/2 cup unsalted butter, melted
- 12 ounces cream cheese, softened
- 1/2 cup granulated sugar
- 1/2 cup sour cream
- 1 teaspoon vanilla extract
- 1 cup heavy cream, whipped
- 1 cup fresh or frozen blackberries
Instructions
- Step 1: Begin by preparing the crust. In a medium bowl, mix together the graham cracker crumbs and sugar. Pour in the melted butter and stir until the crumbs are evenly moistened. Press about 1 tablespoon of the crumb mixture into the bottom of each mini cheesecake pan or muffin tin. Refrigerate for at least 10 minutes to set.
- Step 2: For the cheesecake filling, beat the cream cheese in a large bowl until smooth. Add the granulated sugar and beat until combined. Beat in the sour cream and vanilla extract. Fold in the whipped heavy cream until well combined.
- Step 3: Divide the cheesecake mixture among the prepared pans, filling each about 3/4 of the way full. Top each cheesecake with a few blackberries. Refrigerate for at least 4 hours or overnight until set.
- Step 4: Once set, remove the cheesecakes from the pans. You can serve them as is or garnish with additional blackberries and a drizzle of honey or whipped cream, if desired.
Handy Tips
- For a firmer cheesecake, make sure to chill them for the full recommended time. If using frozen blackberries, thaw and pat dry with a paper towel before using to avoid excess moisture.
- Consider using different types of berries or a mix for varied flavor and color.
- Always use room temperature ingredients for the best mixing results.
Heat Control
Since this recipe is no-bake, heat control is not an issue. However, chilling the cheesecakes is crucial for them to set properly. Ensure your refrigerator is at the correct temperature (around 40°F or 4°C) to help the cheesecakes set within the recommended time.
Crunch Factor
The crunch in these cheesecakes comes from the graham cracker crust. To maintain the crunch, avoid overmixing the crust ingredients, and make sure the crust is properly set in the refrigerator before adding the cheesecake mixture. If you prefer a crunchier topping, you can also sprinkle some chopped nuts or additional graham cracker crumbs on top of the cheesecakes before serving.
Pro Kitchen Tricks
- Use a water bath: Although these cheesecakes are no-bake, if you were to adapt this recipe for a baked version, using a water bath can help prevent cracking.
- Don’t overmix: This applies to both the crust and the cheesecake mixture. Overmixing can lead to a tough crust and a dense cheesecake.
- Let it set: Patience is key. Allowing the cheesecakes to set properly in the refrigerator will result in a better texture and a cleaner release when unmolding.
Storage Tips
- These cheesecakes can be stored in the refrigerator for up to 3 days. Keep them in an airtight container to maintain freshness.
- For longer storage, consider freezing. Place the cheesecakes in a single layer in a freezer-safe container or bag. They can be frozen for up to 2 months. Thaw frozen cheesecakes in the refrigerator overnight.
- When storing, it’s best to keep the cheesecakes away from strong-smelling foods, as they can absorb odors easily.
Gift Packaging Ideas
If you’re considering gifting these mini cheesecakes, they can be beautifully packaged in small gift boxes or containers. Wrap each cheesecake individually in plastic wrap or aluminum foil and place them in the box. You can add a personal touch with a ribbon around the box and a handmade card. For a more rustic look, use small mason jars and top with a decorative lid or a piece of fabric tied with twine.
Flavor Variations
- Different spices: Try adding a pinch of cinnamon, nutmeg, or cardamom to the cheesecake mixture for a unique twist.
- Creative toppings: In addition to blackberries, consider using other fruits like raspberries, blueberries, or strawberries. You can also use caramel sauce, chocolate shavings, or chopped nuts for added flavor and texture.
- Ingredient swaps: For a gluten-free version, use gluten-free graham crackers. You can also experiment with different types of cream cheese or add a dollop of yogurt for extra tanginess.
Troubleshooting
- Texture problems: If your cheesecakes are too soft, they may not have chilled long enough. If they’re too dense, you might have overmixed the batter.
- Ingredient replacements: Always try to use the ingredients listed for the best results. However, if you need to make substitutions, ensure they are akin to the original ingredients in terms of texture and flavor profile.
- Over/undercooking signs: Since this is a no-bake recipe, you won’t have to worry about overcooking. However, underchilling can lead to cheesecakes that don’t set properly. Always refrigerate for the recommended time or longer if necessary.
FAQs
- Can I freeze it? Yes, these cheesecakes can be frozen for up to 2 months. Thaw in the refrigerator overnight when you’re ready to serve.
- Is it gluten-free? The recipe as written includes gluten due to the graham cracker crumbs. However, you can easily make it gluten-free by using gluten-free graham crackers.
- Can I double the recipe? Absolutely. Simply double all the ingredients and proceed with the recipe as instructed. Keep in mind that chilling time might be slightly longer for a larger batch.
Conclusion
Making No-Bake Mini Blackberry Cheesecakes is a delightful experience that combines ease, flavor, and creativity. With these simple steps and tips, you’ll be on your way to creating a dessert that’s sure to impress. Don’t be afraid to experiment with different flavors and toppings to make the recipe your own. Whether you’re a dessert novice or a seasoned pro, these cheesecakes are a great addition to any meal or gathering. So go ahead, give them a try, and enjoy the sweet satisfaction of a job well done!
No-Bake Mini Blackberry Cheesecakes
A simple and delicious no-bake dessert combining cheesecake with the sweetness of blackberries in bite-sized treats.
🥘 Ingredients
👩🍳 Instructions
-
1Prepare the crust by mixing graham cracker crumbs and sugar, then adding melted butter. Press into mini cheesecake pans and refrigerate for 10 minutes.
-
2Beat the cream cheese until smooth, then add granulated sugar, sour cream, and vanilla extract. Fold in whipped heavy cream.
-
3Divide the cheesecake mixture among the prepared pans and top each with a few blackberries. Refrigerate for at least 4 hours or overnight.
-
4Serve chilled, garnished with additional blackberries or whipped cream if desired.