No-Knead Crusty Rolls – Bakery-Style at Home
Introduction
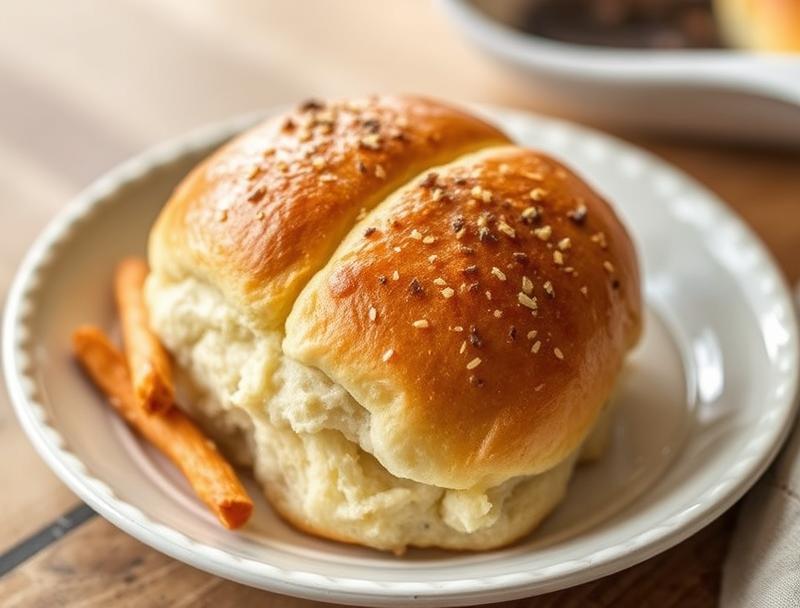
Imagine sinking your teeth into a warm, crusty roll, fresh from the oven, with a soft interior and a satisfying crunch on the outside. The best part? Achieving this bakery-style delight is easier than you think, requiring minimal effort and using everyday ingredients. With the no-knead method, you can create these mouthwatering rolls in the comfort of your own home, perfect for accompanying your favorite meals or as a snack on its own. The simplicity of the recipe, combined with the impressive results, makes it a must-try for anyone looking to elevate their baking skills without spending hours in the kitchen.
Why This Works
- Flavor balance and ingredient accessibility: The beauty of this recipe lies in its use of basic ingredients that are likely already stocked in your pantry, making it accessible to everyone. The combination of yeast, flour, water, salt, and sugar creates a perfect balance of flavors that enhance the natural taste of the bread without overpowering it.
- Ease of preparation: The no-knead method eliminates the need for tedious kneading, significantly reducing the preparation time. This makes the recipe ideal for those new to baking or looking for a quick bread solution.
- Impressive results with minimal effort: Despite the simplicity of the recipe, the end result is remarkably professional. The crusty exterior and soft interior are achieved through a simple rising and baking process, making it perfect for special occasions or everyday meals.
Ingredients
- 1 1/2 cups of warm water
- 2 teaspoons of active dry yeast
- 3 tablespoons of sugar
- 4 cups of all-purpose flour
- 1 teaspoon of salt
- 2 tablespoons of olive oil
- 1 egg, beaten (for egg wash)
- Sesame seeds or poppy seeds for topping (optional)
Instructions
- Step 1: In a large mixing bowl, combine the warm water, yeast, and sugar. Let it sit for about 5-10 minutes, or until the mixture becomes frothy and bubbly, indicating that the yeast is active.
- Step 2: Add the flour, salt, and olive oil to the bowl. Mix the ingredients together until they form a shaggy dough. Cover the bowl with plastic wrap and let it rest in a warm, draft-free place for 12-24 hours. This long fermentation time is what gives the rolls their characteristic flavor and texture.
- Step 3: After the fermentation period, punch down the dough and divide it into 6-8 equal pieces, depending on how large you want your rolls to be. Shape each piece into a ball and then flatten it slightly into a disk shape. Place the rolls onto a baking sheet lined with parchment paper, leaving about 1 inch of space between each roll.
- Step 4: Cover the rolls with a clean towel and let them rise for another 1-2 hours, or until they have doubled in size. Preheat your oven to 425°F (220°C). Brush the tops of the rolls with the beaten egg for a golden glaze and sprinkle with sesame or poppy seeds if desired. Bake the rolls for 15-20 minutes, or until they are golden brown.
Handy Tips
- Use a digital thermometer to ensure your water is at the right temperature for yeast activation, between 100°F and 110°F.
- For an extra crispy crust, bake the rolls for an additional 2-3 minutes. Keep an eye on them to prevent burning.
- Experiment with different toppings such as dried herbs, grated cheese, or chopped nuts to give your rolls a unique flavor and texture.
Heat Control
Heat control is crucial in baking these rolls. The ideal temperature for baking is 425°F (220°C), and the rolls should be baked for 15-20 minutes. To check for doneness, look for a golden brown color and a hollow sound when you tap on the bottom of a roll. If you prefer a crisper crust, you can broil the rolls for an additional minute, watching carefully to avoid burning.
Crunch Factor
Achieving the perfect crunch on your rolls is largely dependent on the baking process. Ensuring the oven is preheated to the correct temperature and not overloading the baking sheet are key. Additionally, using an egg wash before baking helps to create a golden, crispy crust. For an extra crunchy exterior, try baking the rolls at a higher temperature for a shorter amount of time, keeping a close eye on them to prevent overcooking.
Pro Kitchen Tricks
- For a more artisanal look, score the rolls with a sharp knife or razor blade just before baking. This not only adds visual appeal but can also help control the way the rolls expand during baking.
- Use a baking stone in your oven to enhance the crust’s crispiness. Preheat the stone along with your oven to ensure it’s hot when you place the rolls on it.
- Consider using a steamy environment during the baking process to enhance crust development. You can achieve this by placing a pan of water in the oven or using a steam injector if your oven is equipped with one.
Storage Tips
- Cool the rolls completely on a wire rack before storing them in an airtight container at room temperature for up to 3 days.
- For longer storage, consider freezing the rolls. Place them in a single layer in a freezer-safe bag or container and store for up to 2 months. To reheat, thaw overnight at room temperature and then warm in the oven at 350°F (180°C) for about 5 minutes.
- When reheating, you can also refresh the crust by spraying the rolls with a little water and then baking them in a preheated oven at 400°F (200°C) for a few minutes.
Gift Packaging Ideas
If you’re considering gifting these delicious rolls, presentation is key. Place the cooled rolls in a decorative basket or a paper bag and tie the top with a ribbon. You can also wrap individual rolls in parchment paper or a paper bag and tie with twine for a more rustic look. Adding a personal touch, such as a handwritten note or a small jar of homemade jam, can make the gift even more special.
Flavor Variations
- Different spices: Try adding a pinch of salt, a few grinds of black pepper, or some dried herbs like thyme or rosemary to the dough for added depth of flavor.
- Creative toppings: In addition to sesame or poppy seeds, consider using grated cheese, chopped fresh herbs, or even caramelized onions as toppings for your rolls.
- Ingredient swaps: For a whole wheat version, substitute up to half of the all-purpose flour with whole wheat flour. You can also experiment with other types of flour, like rye or spelt, for different flavor profiles.
Troubleshooting
- Texture problems: If your rolls turn out too dense, it might be due to overmixing the dough. Try to mix the ingredients just until they come together, and then let the long fermentation time do the work. If the rolls are too crumbly, it could be a sign of overproofing; try reducing the rising time.
- Ingredient replacements: While it’s best to use the ingredients listed for optimal results, you can make some substitutions. For example, you can use honey or maple syrup instead of sugar, but keep in mind it might affect the yeast’s activity and the overall flavor.
- Over/undercooking signs: Keep an eye on your rolls during the baking time. If they’re not golden brown after 15 minutes, they might need a few more minutes. Conversely, if they start to darken too quickly, cover the tops with foil to prevent overbrowning.
FAQs
- Can I freeze the dough instead of the baked rolls? Yes, you can freeze the dough after the first rise. Simply shape the dough into rolls, place them on a baking sheet, and put it in the freezer. Once frozen, transfer the rolls to a freezer-safe bag or container. When you’re ready to bake, thaw the desired number of rolls overnight in the fridge and then let them rise at room temperature before baking.
- Is this recipe gluten-free? No, this recipe uses all-purpose flour and is not suitable for those with gluten intolerance or sensitivity. However, you can experiment with gluten-free flours, keeping in mind that the results and the recipe might need adjustments.
- Can I double the recipe? Yes, you can easily double or even triple the recipe if you’re planning to feed a larger crowd. Just ensure you have a large enough mixing bowl and baking sheet to accommodate the increased volume of dough and rolls.
Conclusion
Making no-knead crusty rolls at home is a rewarding process that combines simplicity with impressive results. With minimal effort and basic ingredients, you can create bakery-style rolls that are perfect for any occasion. Whether you’re a seasoned baker or just starting out, this recipe is a great addition to your repertoire. Don’t be afraid to experiment with different flavors and toppings to make the rolls truly your own. Share your creations with friends and family, and enjoy the satisfaction of baking something delicious from scratch. Happy baking!
No-Knead Crusty Rolls – Bakery-Style at Home
A simple recipe for achieving bakery-style crusty rolls at home with minimal effort, using a no-knead method and basic ingredients.
🥘 Ingredients
👩🍳 Instructions
-
1Combine warm water, yeast, and sugar. Let it sit for about 5-10 minutes until frothy.
-
2Add flour, salt, and olive oil. Mix until a shaggy dough forms. Cover and let rest for 12-24 hours.
-
3Punch down the dough and divide it into 6-8 equal pieces. Shape into balls and then flatten slightly into disks.
-
4Place the rolls onto a baking sheet, cover, and let rise for 1-2 hours. Preheat oven to 425°F (220°C). Brush tops with egg wash and sprinkle with seeds if desired. Bake for 15-20 minutes or until golden brown.