Easy Crunchy Oreo Treats for Halloween
Introduction
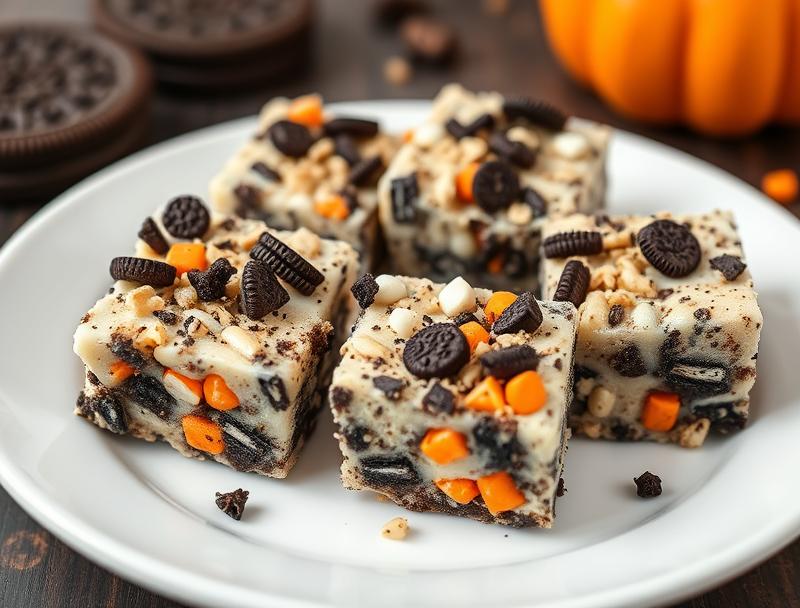
As Halloween approaches, the quest for spooky, delicious, and easy-to-make treats becomes a top priority for many. The Easy Crunchy Oreo Treats are a perfect blend of simplicity, flavor, and creativity, using everyday ingredients to create something truly special. These no-bake bites are not only a delight for both kids and adults but also offer a versatile canvas for your Halloween-themed creativity. With their crunchy exterior giving way to a soft, creamy interior, flavored with the unmistakable taste of Oreos, these treats are sure to be a hit at any Halloween gathering.
Why This Works
- Flavor balance and ingredient accessibility: The combination of Oreos, cream cheese, and vanilla extract creates a balanced flavor profile that is both familiar and exciting. The ingredients are readily available, making these treats accessible to everyone.
- Ease of preparation: The no-bake nature of these treats means that they can be prepared in no time, perfect for last-minute Halloween preparations or as a fun activity with the family.
- Impressive results with minimal effort: Despite the simplicity of the recipe, the end result is impressive and visually appealing, especially when decorated with Halloween-themed toppings or edible decorations.
Ingredients
- 1 package of Oreo cookies, crushed
- 8 ounces of cream cheese, softened
- 1/2 cup of powdered sugar
- 1 teaspoon of vanilla extract
- 1/4 cup of melted white chocolate or candy melts
- Halloween-themed sprinkles, edible eyes, or other decorations
Instructions
- Step 1: In a large mixing bowl, combine the crushed Oreos, softened cream cheese, powdered sugar, and vanilla extract. Mix until well combined and a dough forms.
- Step 2: Use your hands to shape the dough into small balls, about 1 inch in diameter. You should end up with around 20-25 balls.
- Step 3: Melt the white chocolate or candy melts in a microwave-safe bowl in 30-second increments, stirring between each interval, until smooth. Dip the top of each Oreo ball into the melted chocolate and decorate with Halloween-themed sprinkles or edible decorations before the chocolate hardens.
- Step 4: Place the decorated Oreo balls on a baking sheet lined with parchment paper and refrigerate for at least 30 minutes to set the chocolate. Serve chilled and enjoy!
Handy Tips
- To ensure the Oreo balls hold their shape, make sure the cream cheese is softened but not too warm, as this can cause the mixture to become too sticky.
- For an extra crunchy exterior, you can roll the Oreo balls in additional crushed Oreos after shaping them, before dipping in chocolate.
- Experiment with different types of Oreos, like mint or peanut butter, for unique flavor variations.
Heat Control
Since these treats are no-bake, heat control is minimal. However, when melting the white chocolate or candy melts, be cautious not to overheat, as this can cause the chocolate to seize up or become too thin. Microwaving in short intervals and stirring between each heating helps maintain the right consistency.
Crunch Factor
The crunch factor in these treats comes from the crushed Oreos both in the dough and potentially as an additional coating. To achieve the perfect crunch, ensure that the Oreos are finely crushed but still retain some texture. The chocolate coating adds a nice contrast in texture, with the crunch of the Oreos under the smooth chocolate.
Pro Kitchen Tricks
- For a more vibrant appearance, use high-quality food coloring to dye the white chocolate before decorating the Oreo balls.
- To make these treats more substantial, you can insert a lollipop stick or cake pop stick into each ball before the chocolate hardens, making them easier to eat and more fun for kids.
- Consider using a cookie scoop to portion out the dough evenly, ensuring all the Oreo balls are uniform in size.
Storage Tips
- Store the Easy Crunchy Oreo Treats in an airtight container in the refrigerator for up to 5 days.
- For longer storage, these treats can be frozen for up to 2 months. Simply place them in a single layer in a freezer-safe bag or container and thaw at room temperature when ready to serve.
- It’s best to add decorations just before serving, as moisture from the refrigerator can cause some decorations to become soggy or runny.
Gift Packaging Ideas
These treats are perfect for gifting, especially during Halloween. Consider packaging them in small cellophane bags tied with orange and black ribbons, or placing them in mini Halloween-themed containers or cauldrons. A decorative jar filled with these treats and tied with a ribbon can also make for a lovely gift. Don’t forget to include a personalized note or a Halloween-themed card to make it an extra-special gift.
Flavor Variations
- Different spices: Add a pinch of cinnamon or nutmeg to the dough for a warm, autumnal flavor.
- Creative toppings: Use edible gold dust, sprinkles, or small candies to create a variety of looks and themes.
- Ingredient swaps: Replace traditional Oreos with another favorite cookie, like peanut butter cookies or chocolate sandwich cookies, for a unique twist.
Troubleshooting
- Texture problems: If the dough is too sticky, add a bit more crushed Oreos. If it’s too dry, add a small amount of cream cheese.
- Ingredient replacements: While Oreos are a key ingredient, you can experiment with other types of cookies. However, keep in mind that the flavor and texture may vary significantly.
- Over/undercooking signs: Since these are no-bake treats, the concern is more about the chocolate coating. If the chocolate is too thin, it may not set properly. If it’s too thick, it may be difficult to coat the Oreo balls evenly.
FAQs
- Can I freeze it? Yes, these treats can be frozen for up to 2 months. It’s best to freeze them without decorations and decorate after thawing.
- Is it gluten-free? Depending on the type of Oreos used, these treats may or may not be gluten-free. Traditional Oreos contain gluten, but there are gluten-free alternatives available.
- Can I double the recipe? Yes, the recipe can be easily doubled or tripled to make more treats. Just ensure you have enough space in your refrigerator to store them.
Conclusion
With their ease of preparation, delicious flavor, and the fun of decorating, the Easy Crunchy Oreo Treats for Halloween are a must-try for anyone looking to add a little magic to their Halloween celebrations. Whether you’re making them for a spooky party, a family gathering, or just a fun activity with the kids, these treats are sure to bring smiles and satisfaction. Feel free to experiment with different decorations and flavors to make them your own, and don’t hesitate to share your creations with friends and family. Happy Halloween, and happy baking!
Easy Crunchy Oreo Treats for Halloween
A no-bake Halloween treat made with crushed Oreos, cream cheese, and decorated with white chocolate and spooky decorations.
🥘 Ingredients
👩🍳 Instructions
-
1Combine crushed Oreos, cream cheese, powdered sugar, and vanilla extract in a bowl and mix until a dough forms.
-
2Shape the dough into small balls, about 1 inch in diameter.
-
3Melt white chocolate or candy melts and dip the top of each Oreo ball into the chocolate, decorating with Halloween-themed sprinkles before the chocolate hardens.
-
4Refrigerate the decorated Oreo balls for at least 30 minutes to set the chocolate, then serve chilled.