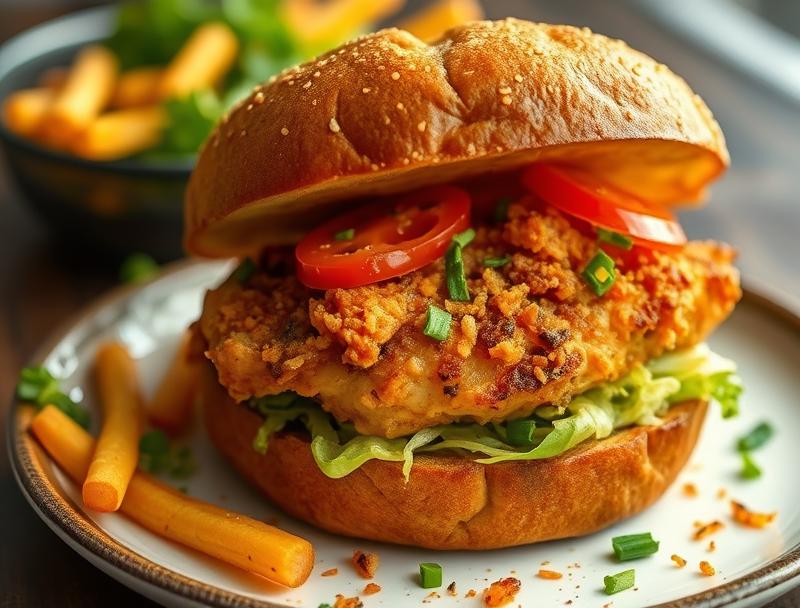
Crispy Dill Chicken Sandwich: The Ultimate Crunchy Bite
Introduction
Imagine biting into a juicy chicken sandwich, the crunch of the crispy exterior giving way to tender, flavorful meat, all wrapped in a soft bun and infused with the bright, refreshing taste of dill. The Crispy Dill Chicken Sandwich is more than just a meal; it’s an experience that combines ease, flavor, and creativity, using everyday ingredients to create something truly special. This recipe is perfect for a quick dinner, a picnic, or even as a gourmet offering at your next backyard barbecue. With its perfect balance of crunch and zest, it’s sure to become a favorite among both kids and adults.
Why This Works
- Flavor balance and ingredient accessibility: The combination of crispy chicken, tangy dill, and soft bun creates a harmonious balance of flavors and textures that is hard to resist. Plus, all the ingredients are easily found in most supermarkets, making it accessible to everyone.
- Ease of preparation: Despite its impressive outcome, this recipe is surprisingly easy to prepare. It requires minimal cooking skills and can be ready in under 30 minutes, perfect for busy weeknights or last-minute gatherings.
- Impressive results with minimal effort: The secret to this recipe’s success lies in its simplicity. With just a few ingredients and straightforward steps, you can achieve restaurant-quality results that are sure to impress your family and friends.
Ingredients
- 4 boneless, skinless chicken breasts
- 1 cup all-purpose flour
- 1 teaspoon paprika
- 1 teaspoon garlic powder
- 1 teaspoon onion powder
- 1 teaspoon salt
- 1/2 teaspoon black pepper
- 1/4 teaspoon cayenne pepper (optional)
- 1 cup panko breadcrumbs
- 2 tablespoons olive oil
- 1/4 cup mayonnaise
- 1 tablespoon freshly chopped dill
- 4 hamburger buns
- Lettuce, tomato, pickles, and any other desired toppings
Instructions
- Step 1: Prepare the Chicken – In a shallow dish, mix together the flour, paprika, garlic powder, onion powder, salt, black pepper, and cayenne pepper (if using). In another dish, beat the eggs. In a third dish, place the panko breadcrumbs.
- Step 2: Bread the Chicken – Dip each chicken breast first in the flour mixture, coating both sides evenly, then in the eggs, making sure they’re fully coated, and finally in the panko breadcrumbs, pressing the crumbs onto the chicken to ensure they stick. Place the breaded chicken on a plate or tray.
- Step 3: Fry the Chicken – Heat about 1/2 inch of olive oil in a large skillet over medium-high heat. When the oil is hot, add 2 chicken breasts (do not overcrowd) and fry for about 5-6 minutes on each side, or until they are golden brown and cooked through. Repeat with the remaining chicken breasts.
- Step 4: Assemble the Sandwiches – While the chicken is cooking, toast the buns on the grill or in a toaster. Spread a layer of mayonnaise on the bottom bun, followed by a piece of lettuce, a tomato slice, a few pickle slices, a chicken breast, and finally the top bun. Sprinkle some chopped fresh dill on top of the chicken for extra flavor and freshness.
Handy Tips
- For an extra crispy coating, you can chill the breaded chicken in the refrigerator for 30 minutes before frying.
- Do not overcrowd the skillet, as this can lower the oil temperature and result in a less crispy exterior.
- Always check the internal temperature of the chicken to ensure it reaches 165°F (74°C) for food safety.
Heat Control
Maintaining the right heat is crucial for achieving that perfect crispy exterior without burning the chicken. Ideally, the oil should be between 350°F and 375°F (175°C to 190°C). If you don’t have a thermometer, you can test the heat by dropping a small piece of breadcrumb into the oil; if it sizzles and rises to the surface, the oil is ready. The chicken is done when it’s golden brown and the internal temperature reaches 165°F (74°C).
Crunch Factor
The crunch in this recipe comes from the panko breadcrumbs, which provide a lighter, crisper coating than regular breadcrumbs. To enhance the crunch, make sure the chicken is dry before breading, and press the breadcrumbs onto the chicken firmly. Also, frying at the right temperature helps in achieving the perfect crunch.
Pro Kitchen Tricks
- Use a thermometer to ensure the oil is at the right temperature for frying.
- Don’t overbread the chicken; a light coating is enough to provide crunch without overwhelming the dish.
- For easier cleanup, line your work surface with parchment paper before breading the chicken.
Storage Tips
- The breaded but unfried chicken can be stored in the refrigerator for up to a day.
- Cooked chicken sandwiches are best served immediately, but you can store them in an airtight container in the refrigerator for up to a day. Reheat gently in the oven or microwave until warmed through.
- For longer storage, consider freezing the breaded and fried chicken breasts without the buns and toppings, then assemble the sandwiches when you’re ready to serve.
Gift Packaging Ideas
If you’re considering gifting these sandwiches, perhaps for a picnic or as part of a meal kit, you can package them in cute paper bags or containers with the toppings and buns on the side. Add a personal touch with a handwritten note or a small jar of homemade mayonnaise or pickles.
Flavor Variations
- Different spices: Try adding some dried herbs like thyme or oregano to the breadcrumb mixture for a different twist.
- Creative toppings: Experiment with various cheeses, bacon, avocado, or grilled onions to add more flavor and texture.
- Ingredient swaps: For a lighter version, use grilled chicken instead of fried, or swap the mayonnaise with a healthier alternative like Greek yogurt or avocado spread.
Troubleshooting
- Texture problems: If the chicken becomes too greasy, it might be because the oil wasn’t hot enough. Try increasing the heat or patting the chicken dry with paper towels after frying.
- Ingredient replacements: If you can’t find panko breadcrumbs, regular breadcrumbs can be used as a substitute, though the crunch might not be as pronounced.
- Over/undercooking signs: Make sure to check the chicken frequently while it’s frying. If it’s undercooked, it will feel soft and squishy, while overcooked chicken will be hard and dry.
FAQs
- Can I freeze it? Yes, you can freeze the breaded and fried chicken breasts for up to 3 months. Simply thaw and reheat when you’re ready.
- Is it gluten-free? The recipe can be adapted to be gluten-free by using gluten-free flour and ensuring the breadcrumbs are gluten-free.
- Can I double the recipe? Absolutely, this recipe can be easily doubled or tripled for larger gatherings. Just be sure to fry the chicken in batches to avoid overcrowding the skillet.
Conclusion
The Crispy Dill Chicken Sandwich is a versatile and delicious meal that can be enjoyed in countless ways. Whether you’re a fan of classic comfort food or looking to spice up your meal routine, this recipe offers a perfect blend of flavors and textures that is sure to please. Don’t be afraid to experiment with different toppings and seasonings to make it your own, and consider sharing your creations with friends and family. With its simplicity, flavor, and impressive presentation, the Crispy Dill Chicken Sandwich is a dish that will become a staple in your kitchen, promising a crunchy, satisfying bite every time.
Crispy Dill Chicken Sandwich: The Ultimate Crunchy Bite
A crispy and flavorful chicken sandwich infused with the freshness of dill, perfect for any meal or gathering.
🥘 Ingredients
👩🍳 Instructions
-
1Prepare the chicken by mixing the flour, paprika, garlic powder, onion powder, salt, black pepper, and cayenne pepper (if using) in a shallow dish.
-
2Bread the chicken by dipping each breast first in the flour mixture, then in the eggs, and finally in the panko breadcrumbs, pressing the crumbs onto the chicken to ensure they stick.
-
3Fry the chicken in about 1/2 inch of olive oil in a large skillet over medium-high heat until golden brown and cooked through, about 5-6 minutes on each side.
-
4Assemble the sandwiches by spreading mayonnaise on the bottom bun, adding lettuce, tomato, pickles, a chicken breast, and finally the top bun. Sprinkle with chopped fresh dill.