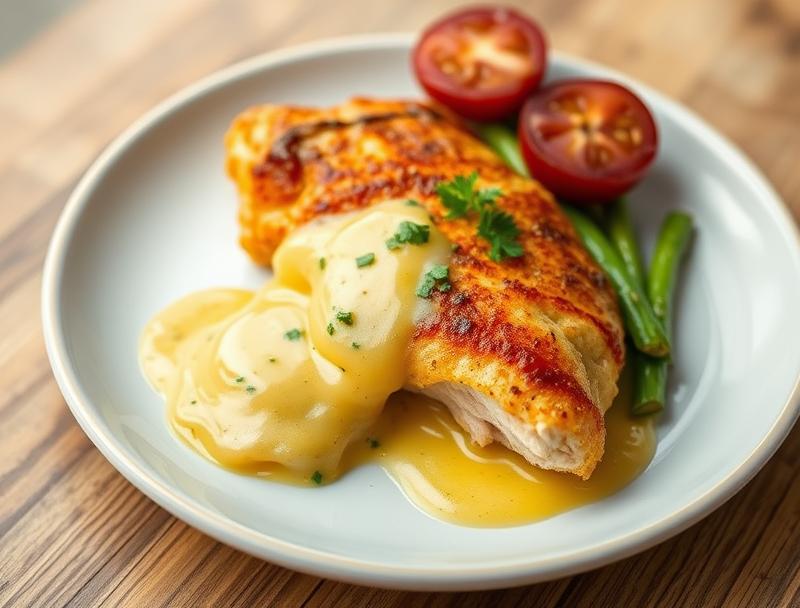
Chicken Kiev with Garlic Butter
Introduction
Imagine a dish that is both elegant and comforting, made with everyday ingredients that anyone can find in their local market. Chicken Kiev with Garlic Butter is a culinary masterpiece that embodies the perfect balance of flavors, textures, and presentation. This classic Ukrainian dish has been a staple of fine dining for decades, and its appeal lies in its simplicity and the explosion of flavors that it delivers. With this recipe, you’ll learn how to create a truly impressive meal that will delight your family and friends, all while using ingredients that are easily accessible and require minimal preparation.
Why This Works
- Flavor balance and ingredient accessibility: The combination of chicken, garlic butter, and herbs creates a rich and savory flavor profile that is hard to resist. The best part is that all the ingredients are easily found in most supermarkets, making it a convenient option for a weeknight dinner or a special occasion.
- Ease of preparation: Despite its sophisticated appearance, Chicken Kiev with Garlic Butter is surprisingly easy to prepare. The steps are straightforward, and the ingredients are simple to work with, making it a great option for cooks of all skill levels.
- Impressive results with minimal effort: The end result is a dish that looks and tastes like it was prepared by a professional chef, but requires minimal effort and time. This makes it an excellent choice for entertaining guests or special occasions when you want to make a lasting impression.
Ingredients
- 4 boneless, skinless chicken breasts
- 1/2 cup (1 stick) unsalted butter, softened
- 4 cloves garlic, minced
- 1 tablespoon freshly chopped parsley
- 1 teaspoon dried dill weed
- Salt and pepper, to taste
- 1 cup all-purpose flour
- 1 teaspoon paprika
- 1/4 teaspoon cayenne pepper (optional)
- 2 eggs, beaten
- 1 cup panko breadcrumbs
- Olive oil, for frying
Instructions
- Step 1: Prepare the Garlic Butter – In a small bowl, mix together the softened butter, minced garlic, chopped parsley, dried dill weed, salt, and pepper until well combined. Set aside.
- Step 2: Prepare the Chicken – Lay the chicken breasts flat and make a horizontal incision in each breast to create a pocket. Be careful not to cut all the way through the breast. Stuff each breast with the garlic butter mixture, dividing it evenly among the four breasts.
- Step 3: Coat the Chicken – In a shallow dish, mix together the flour, paprika, and cayenne pepper (if using). In another dish, beat the eggs. In a third dish, place the panko breadcrumbs. Dip each stuffed chicken breast in the flour mixture, coating both sides, then in the eggs, and finally in the breadcrumbs, pressing the crumbs gently onto the chicken to help them stick.
- Step 4: Fry the Chicken – Heat about 1/2 inch of olive oil in a large skillet over medium-high heat. When the oil is hot, add the breaded chicken breasts and fry until golden brown and cooked through, about 5-6 minutes per side. Repeat with the remaining chicken breasts.
- Step 5: Serve – Once the chicken is cooked, remove it from the oil and place it on a paper towel-lined plate to drain any excess oil. Serve hot and enjoy!
Handy Tips
- Make sure to not overstuff the chicken breasts with the garlic butter, as this can make them difficult to coat and fry evenly.
- Use a thermometer to ensure the oil reaches the correct temperature (about 350°F) for frying. This will help the breadcrumbs brown evenly and prevent the chicken from absorbing too much oil.
- Don’t overcrowd the skillet when frying the chicken. Cook them one or two at a time, depending on the size of your skillet, to ensure they have enough room to cook evenly.
Heat Control
Heat control is crucial when frying the chicken breasts. The ideal temperature for frying is between 325°F and 375°F. If the oil is too hot, the breadcrumbs will burn before the chicken is cooked through. If the oil is not hot enough, the chicken will absorb too much oil and be greasy. Use a thermometer to monitor the temperature, and adjust the heat as needed to maintain the optimal frying temperature.
Crunch Factor
The crunch factor in Chicken Kiev with Garlic Butter comes from the panko breadcrumbs. To achieve the perfect crunch, make sure the breadcrumbs are evenly coated on the chicken and that the oil is at the right temperature for frying. Also, don’t overcook the chicken, as this can make the breadcrumbs lose their crunch. The chicken is done when it reaches an internal temperature of 165°F.
Pro Kitchen Tricks
- For an extra crispy coating, you can chill the breaded chicken breasts in the refrigerator for about 30 minutes before frying. This will help the breadcrumbs adhere better to the chicken.
- To prevent the garlic butter from melting out of the breadcrumbs during frying, you can freeze the stuffed chicken breasts for about 10-15 minutes before coating and frying. This will help the butter stay inside the chicken.
- For a lighter version, you can bake the chicken instead of frying. Simply place the breaded chicken breasts on a baking sheet lined with parchment paper and bake in a preheated oven at 400°F for about 20-25 minutes, or until cooked through.
Storage Tips
- Leftover Chicken Kiev can be stored in an airtight container in the refrigerator for up to 3 days. Reheat in the oven or microwave until warmed through.
- It’s not recommended to freeze cooked Chicken Kiev, as the breadcrumbs can become soggy. However, you can freeze the stuffed and breaded chicken breasts before frying for up to 2 months. Simply thaw and fry as directed.
- When reheating, make sure the chicken is heated to an internal temperature of 165°F to ensure food safety.
Gift Packaging Ideas
While Chicken Kiev with Garlic Butter is typically served as a main dish, the garlic butter itself can be packaged as a gift. Consider placing the garlic butter in a decorative jar or container, wrapping it in parchment paper or aluminum foil, and tying it with a ribbon. You can also include a packet of panko breadcrumbs and a few fresh herbs for a complete gift. This makes a thoughtful and unique gift for any foodie or cook in your life.
Flavor Variations
- Different spices: Try adding some dried thyme or oregano to the garlic butter for a different herbal flavor. You can also add a pinch of cayenne pepper for some heat.
- Creative toppings: Serve the Chicken Kiev with a side of your favorite sauce, such as marinara, Alfredo, or a simple lemon butter sauce. You can also top it with some sautéed mushrooms or spinach for added flavor and nutrition.
- Ingredient swaps: For a gluten-free version, you can use gluten-free breadcrumbs or substitute with almond flour. For a dairy-free version, you can use a dairy-free butter substitute.
Troubleshooting
- Texture problems: If the breadcrumbs are not crunchy, it may be due to the oil not being hot enough or the chicken being overcooked. If the chicken is dry, it may be due to overcooking or not enough garlic butter inside the chicken.
- Ingredient replacements: If you don’t have panko breadcrumbs, you can substitute with regular breadcrumbs or even crushed crackers. If you don’t have garlic, you can use shallots or onions as a substitute.
- Over/undercooking signs: The chicken is done when it reaches an internal temperature of 165°F. If it’s undercooked, it will be pink in the center. If it’s overcooked, it will be dry and tough.
FAQs
- Can I freeze it? Yes, you can freeze the stuffed and breaded chicken breasts before frying for up to 2 months. Simply thaw and fry as directed.
- Is it gluten-free? No, the traditional recipe includes panko breadcrumbs, which contain gluten. However, you can make a gluten-free version by using gluten-free breadcrumbs or substituting with almond flour.
- Can I double the recipe? Yes, you can easily double or triple the recipe to feed a larger crowd. Simply multiply the ingredients accordingly and adjust the cooking time as needed.
Conclusion
Chicken Kiev with Garlic Butter is a dish that is sure to impress your family and friends with its rich flavors and elegant presentation. With its ease of preparation and use of everyday ingredients, it’s a great option for a weeknight dinner or special occasion. Don’t be afraid to experiment with different spices and toppings to make the dish your own, and don’t hesitate to reach out if you have any questions or need further guidance. Happy cooking!
Chicken Kiev with Garlic Butter
A classic Ukrainian dish made with chicken, garlic butter, and herbs, resulting in a rich and savory flavor profile.
🥘 Ingredients
👩🍳 Instructions
-
1Prepare the garlic butter by mixing together the softened butter, minced garlic, chopped parsley, dried dill weed, salt, and pepper.
-
2Prepare the chicken by laying the breasts flat and making a horizontal incision in each to create a pocket. Stuff each breast with the garlic butter mixture.
-
3Coat the chicken by dipping each stuffed breast in the flour mixture, then the eggs, and finally the panko breadcrumbs.
-
4Fry the chicken in hot olive oil until golden brown and cooked through, about 5-6 minutes per side.
-
5Serve the Chicken Kiev hot and enjoy!