Chicken Philly Sliders – Cheesy, Savory and Perfect for Sharing!
Introduction
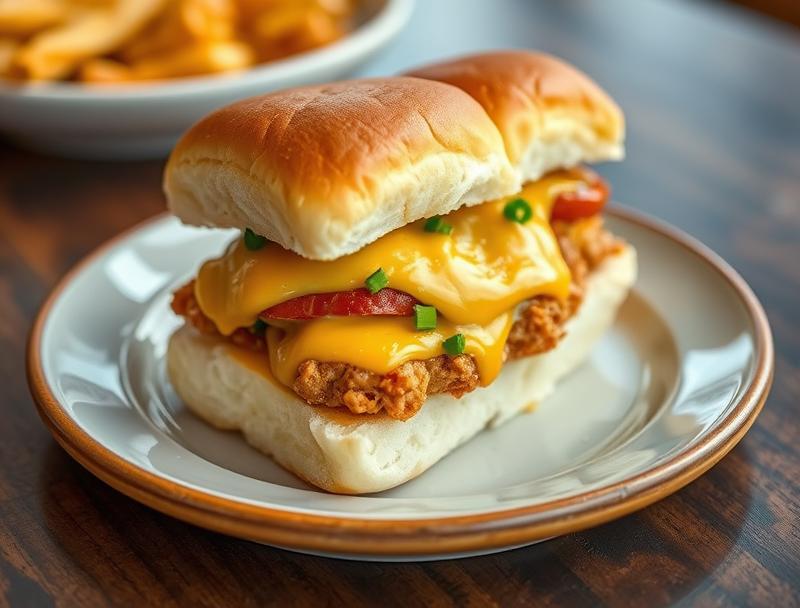
Imagine sinking your teeth into a juicy, cheesy, and savory Chicken Philly Slider, feeling the perfect balance of flavors and textures in each bite. This recipe is a game-changer for anyone looking to impress their family and friends with a dish that’s both easy to make and incredibly delicious. Using everyday ingredients, you can create a culinary masterpiece that will leave everyone wanting more. The beauty of Chicken Philly Sliders lies in their simplicity and versatility, making them perfect for sharing at parties, picnics, or casual gatherings. So, let’s dive into the world of these mouthwatering sliders and explore what makes them so special.
Why This Works
- Flavor balance and ingredient accessibility: The combination of chicken, cheese, bell peppers, onions, and a hint of spice creates a flavor profile that’s both familiar and exciting. Plus, all the ingredients are easily found in most supermarkets.
- Ease of preparation: Despite the impressive results, preparing Chicken Philly Sliders is remarkably straightforward. It involves basic cooking techniques that even novice cooks can master.
- Impressive results with minimal effort: What’s most appealing about this recipe is how it transforms simple ingredients into a dish that looks and tastes like it came from a high-end restaurant, all with minimal fuss and effort.
Ingredients
- 1 pound boneless, skinless chicken breasts, sliced into thin strips
- 2 tablespoons olive oil
- 1 large onion, sliced
- 2 large bell peppers (any color), sliced
- 4 cloves garlic, minced
- 4 hoagie rolls
- 4 slices of cheese (provolone or cheese of your choice)
- 1 teaspoon dried oregano
- Salt and pepper, to taste
- Optional: mayo, mustard, pickles, or any other toppings you like
Instructions
- Step 1: Begin by slicing the chicken into thin strips and seasoning with salt, pepper, and dried oregano. Set aside.
- Step 2: Heat 1 tablespoon of olive oil in a large skillet over medium-high heat.! Add the chicken and cook until browned and cooked through, about 5-6 minutes. Remove the chicken from the skillet and set aside.
- Step 3: In the same skillet, add the remaining 1 tablespoon of olive oil. Add the sliced onions and bell peppers and cook, stirring occasionally, until they are tender and lightly charred, about 8-10 minutes. Add the minced garlic and cook for an additional minute.
- Step 4: To assemble the sliders, slice the hoagie rolls in half and place them in the oven at 350°F (180°C) for a few minutes to toast lightly. Then, add a slice of cheese to the bottom half of each roll, followed by a few pieces of the cooked chicken, some of the onion and bell pepper mixture, and finally the top half of the roll.
Handy Tips
- For an extra crispy crust on your rolls, brush them lightly with olive oil before toasting.
- Consider using different types of cheese or adding some spice to the chicken for an extra kick.
- Make sure to not overcook the chicken or the vegetables to maintain the best texture and flavor.
Heat Control
Maintaining the right heat is crucial, especially when cooking the chicken and the vegetables. For the chicken, ensure the skillet is at medium-high heat to achieve a nice brown crust on the outside while keeping the inside juicy. For the vegetables, a medium heat allows them to cook slowly and evenly, bringing out their natural sweetness without burning.
Crunch Factor
The crunch factor in Chicken Philly Sliders comes from the toasted hoagie rolls and the slight crispiness of the cooked vegetables. To enhance this, make sure to toast the rolls just before assembling the sliders, and don’t overcook the vegetables, as this can make them too soft.
Pro Kitchen Tricks
- Marinate the chicken in your favorite seasonings for a few hours before cooking for an added depth of flavor.
- Use a cast-iron skillet for cooking, as it retains heat well and can achieve a nice sear on the chicken and vegetables.
- Prepare the ingredients ahead of time. Slice the onions and bell peppers, and have the cheese and rolls ready to go, making the assembly process smooth and efficient.
Storage Tips
- Leftover sliders can be stored in the refrigerator for up to 2 days. Reheat them in the oven at 350°F (180°C) for a few minutes to refresh.
- Consider storing the components separately (cooked chicken, vegetables, and toasted rolls) to make reheating and assembling easier and to prevent sogginess.
- For longer storage, cook the chicken and vegetables, then freeze them. Assemble the sliders when you’re ready to serve.
Gift Packaging Ideas
If you’re planning to share these sliders as a gift, consider packaging them in a cute basket or container with all the fixings, including extra cheese, condiments, and pickles. You could also wrap individual sliders in foil or parchment paper and tie with a ribbon for a more rustic, homemade feel.
Flavor Variations
- Different spices: Add some cumin for a southwestern twist or paprika for a smoky flavor.
- Creative toppings: Include jalapeños for an extra kick, avocado for creaminess, or bacon for a smoky, savory flavor.
- Ingredient swaps: Use steak or pork instead of chicken for a different protein, or substitute the cheese with a dairy-free alternative for a vegan version.
Troubleshooting
- Texture problems: If the chicken is too dry, it might have been overcooked. Try cooking it for less time or using a meat thermometer to ensure it reaches a safe internal temperature without overcooking.
- Ingredient replacements: If you can’t find provolone cheese, mozzarella or cheddar can be good substitutes. For the vegetables, zucchini or mushrooms could add interesting textures and flavors.
- Over/undercooking signs: Chicken should be cooked through and reach an internal temperature of 165°F (74°C). Vegetables should be tender but still crisp; if they’re too soft, they’ve been overcooked.
FAQs
- Can I freeze it? Yes, you can freeze the cooked chicken and vegetables for up to 3 months. Assemble the sliders when you’re ready to serve.
- Is it gluten-free? The recipe as described is not gluten-free due to the hoagie rolls. However, you can substitute the rolls with gluten-free alternatives to make it suitable for those with gluten intolerance.
- Can I double the recipe? Absolutely, this recipe scales well. Just remember to adjust the cooking time slightly if you’re cooking larger quantities of chicken and vegetables.
Conclusion
Chicken Philly Sliders are a versatile and delicious addition to any meal or gathering. With their perfect blend of cheesy, savory, and slightly crunchy elements, they’re sure to become a favorite. Don’t be afraid to experiment with different ingredients and toppings to make the recipe your own, and enjoy the process of sharing these tasty treats with your loved ones. Whether you’re a seasoned cook or just starting out, this recipe is a must-try for its ease, flavor, and the joy it brings to those who taste it.
Chicken Philly Sliders – Cheesy, Savory and Perfect for Sharing!
A delicious and easy-to-make recipe for Chicken Philly Sliders, perfect for sharing at any gathering.
🥘 Ingredients
👩🍳 Instructions
-
1Season the chicken with salt, pepper, and oregano.
-
2Cook the chicken in a skillet until browned and cooked through.
-
3Cook the sliced onions and bell peppers in the skillet until tender.
-
4Assemble the sliders by placing cheese, chicken, and vegetables on the hoagie rolls.