Stuffed Baked Acorn Squash
Introduction
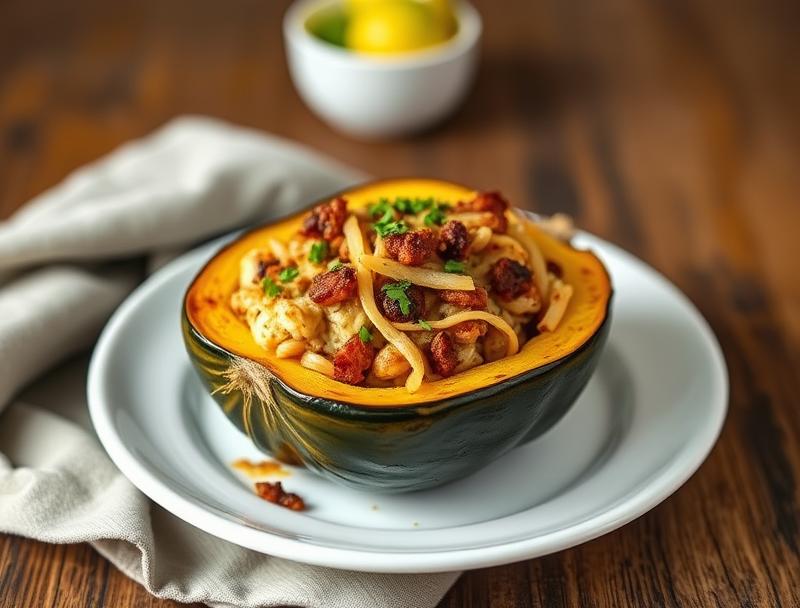
As the seasons change and the air grows cooler, our taste buds often crave dishes that are both comforting and visually appealing. Stuffed baked acorn squash is one such recipe that perfectly embodies the spirit of autumn, with its vibrant colors and hearty, warming flavors. This dish is not only a treat for the eyes, with its beautifully presented squash halves, but it’s also incredibly easy to make, requiring minimal effort for a truly impressive result. By utilizing everyday ingredients and a simple cooking method, you can create a meal that’s both healthy and indulgent, perfect for a cozy night in or a special occasion.
Why This Works
- The balance of flavors in this recipe, combining the sweetness of the squash with the savory elements of the filling, creates a dish that’s both satisfying and exciting to the palate.
- The ease of preparation makes it accessible to cooks of all skill levels. With straightforward steps and common ingredients, it’s a recipe that anyone can follow and enjoy.
- Despite its simplicity, the presentation of stuffed baked acorn squash is impressive, making it an ideal choice for dinner parties or special events. The minimal effort required for such a visually appealing dish is a significant bonus.
Ingredients
- 2 large acorn squash
- 1 tablespoon olive oil
- 1 onion, finely chopped
- 2 cloves garlic, minced
- 1 cup cooked rice (white or brown)
- 1 cup black beans, cooked
- 1 cup diced tomatoes
- 1 teaspoon cumin
- 1 teaspoon smoked paprika
- Salt and pepper, to taste
- 1/4 cup chopped fresh cilantro (for garnish)
- Shredded cheese (optional, for serving)
Instructions
- Step 1: Prepare the Squash – Preheat the oven to 400°F (200°C). Cut the acorn squash in half lengthwise and scoop out the seeds and pulp. Place the squash halves on a baking sheet, cut side up, and drizzle with olive oil. Season with salt and pepper. Roast in the oven for about 30 minutes, or until the squash is tender and caramelized.
- Step 2: Prepare the Filling – In a large skillet, heat a couple of tablespoons of olive oil over medium heat. Add the chopped onion and cook until softened, about 5 minutes. Add the minced garlic and cook for another minute, until fragrant. Then, add the cooked rice, black beans, diced tomatoes, cumin, and smoked paprika. Stir well to combine and cook for a few minutes until the flavors are melded together. Season with salt and pepper to taste.
- Step 3: Assemble and Bake – Once the squash is ready, fill each squash half with the rice and bean mixture, dividing it evenly between the two squash halves. If using cheese, sprinkle it on top of the filling. Return the stuffed squash to the oven and bake for an additional 15-20 minutes, until the filling is heated through and the cheese is melted and bubbly.
- Step 4: Serve – Remove the squash from the oven and let it cool for a few minutes. Garnish with chopped cilantro and serve warm. You can offer additional cheese, sour cream, or salsa on the side, if desired.
Handy Tips
- For an extra crunchy topping, sprinkle some toasted pumpkin seeds or chopped nuts on top of the cheese before the final baking.
- Consider using leftover cooked chicken, steak, or roasted vegetables to add more protein and variety to the filling.
- Acorn squash can be substituted with other types of squash, such as butternut or carnival squash, though cooking times may vary.
Heat Control
Maintaining the right oven temperature is crucial for perfectly cooked squash. Ensure your oven is at 400°F (200°C) for roasting the squash and adjust the cooking time based on the squash’s size and your oven’s performance. The squash is done when it’s tender and easily pierced with a fork.
Crunch Factor
Achieving the right texture, especially a nice crunch, can elevate this dish. Adding toasted seeds or nuts on top before baking provides a satisfying crunch. Additionally, using a variety of textures in the filling, such as cooked rice, beans, and diced tomatoes, contributes to a more engaging eating experience.
Pro Kitchen Tricks
- To make the squash easier to cut, microwave it for 2-3 minutes to soften the skin before cutting it in half.
- Use a flavorful oil like olive or avocado oil to drizzle over the squash for added depth of flavor.
- Prepare the filling ahead of time and refrigerate or freeze it until ready to assemble and bake the squash, making this a great meal prep option.
Storage Tips
- Leftover stuffed squash can be refrigerated for up to 3 days. Reheat in the oven or microwave until warmed through.
- Freezing is also an option; assemble the squash without baking, then freeze. Bake frozen squash at 375°F (190°C) for about 45 minutes, or until tender and heated through.
- Use airtight, microwave-safe containers for reheating leftovers to prevent drying out the squash.
Gift Packaging Ideas
If you’re considering gifting this dish, perhaps for a potluck or as a care package, consider presenting it in a decorative baking dish or a wooden crate filled with fall-themed elements like leaves or small pumpkins. Adding a jar of homemade salsa or a bag of crusty bread on the side can make it a complete and thoughtful gift.
Flavor Variations
- Spicy Twist: Add diced jalapeños or red pepper flakes to the filling for a spicy kick.
- Mediterranean Style: Incorporate feta cheese, kalamata olives, and a sprinkle of oregano into the filling for a Mediterranean flair.
- Indian Inspiration: Mix in some curry powder, chopped cilantro, and diced mango for a unique and exotic twist.
Troubleshooting
- Undercooked Squash: If the squash is not tender after the initial 30 minutes, continue to roast in 10-minute increments until it reaches your desired level of doneness.
- Dry Filling: Add a bit more diced tomato or a splash of broth to the filling if it becomes too dry during baking.
- Overcooked Squash: To prevent the squash from becoming too soft, check on it frequently during the last 15 minutes of baking, and cover the top with foil if it starts to brown too quickly.
FAQs
- Can I freeze it? Yes, you can freeze the stuffed squash before baking. Simply assemble, freeze, and then bake at 375°F (190°C) for about 45 minutes, or until heated through.
- Is it gluten-free? This recipe is naturally gluten-free, making it a great option for those with dietary restrictions.
- Can I double the recipe? Absolutely, this recipe can be easily doubled or tripled for larger gatherings. Just ensure you have enough baking sheets and oven space for the additional squash.
Conclusion
Stuffed baked acorn squash is a versatile and delicious dish that can be enjoyed throughout the year, but it’s especially fitting during the fall and winter seasons. With its rich flavors, nutritious ingredients, and beautiful presentation, it’s perfect for both everyday meals and special occasions. Feel free to experiment with different fillings and toppings to make the recipe your own, and don’t hesitate to share your creations with friends and family. Whether you’re a seasoned cook or just starting out, this recipe is sure to become a favorite, offering a satisfying and healthy meal option that’s as easy as it is impressive.
Stuffed Baked Acorn Squash
A delicious and healthy recipe for stuffed baked acorn squash, perfect for fall and winter meals.
🥘 Ingredients
👩🍳 Instructions
-
1Preheat the oven to 400°F (200°C).
-
2Cut the acorn squash in half lengthwise and scoop out the seeds and pulp.
-
3Place the squash halves on a baking sheet, cut side up, and drizzle with olive oil. Season with salt and pepper.
-
4Roast in the oven for about 30 minutes, or until the squash is tender and caramelized.
-
5Prepare the filling by cooking the onion, garlic, rice, black beans, diced tomatoes, cumin, and smoked paprika in a skillet.
-
6Fill each squash half with the rice and bean mixture and return to the oven for an additional 15-20 minutes, until the filling is heated through.