Smoothie Pops: Healthy After-School Treats
Introduction
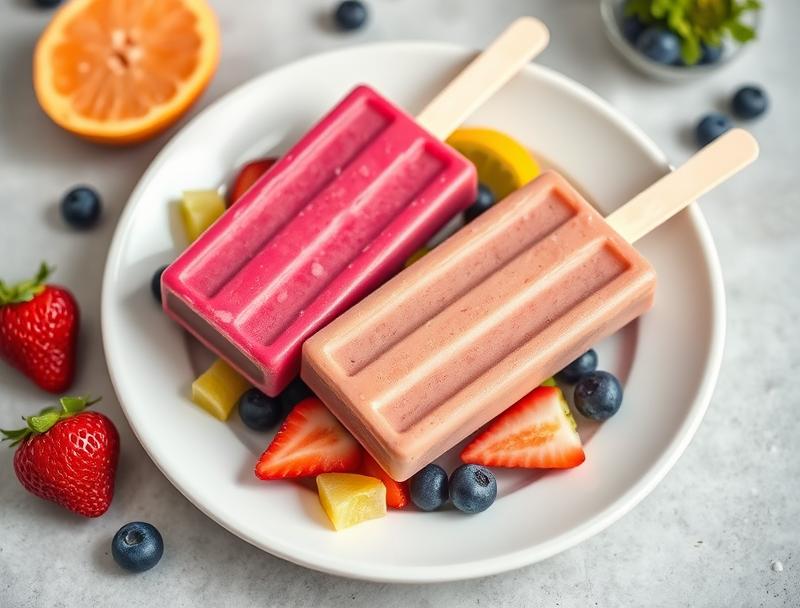
Imagine a refreshing, healthy, and fun treat that you can easily prepare for your kids after school, using ingredients you likely have in your fridge and pantry. Smoothie Pops are the perfect solution for parents looking to provide a sweet and nutritious snack that doesn’t compromise on flavor or creativity. By blending your favorite fruits, yogurts, and a touch of honey, you can create a variety of delicious and colorful popsicles that your kids will love. The best part? You can customize them to suit any taste or dietary requirement, making them an excellent option for kids with food allergies or preferences. In this article, we’ll guide you through the simple process of making Smoothie Pops, offering tips, tricks, and variations to make this treat a staple in your household.
Why This Works
- Flavor balance and ingredient accessibility: Smoothie Pops allow you to mix and match a wide range of fruits and yogurts, ensuring that every pop is a perfect balance of sweet and tangy, and that you can easily find all the ingredients in your local grocery store.
- Ease of preparation: The process of making Smoothie Pops is incredibly straightforward, requiring just a few minutes of blending and pouring into popsicle molds. This makes it an ideal activity to do with your kids, teaching them about measurements, mixing, and patience.
- Impressive results with minimal effort: Despite the simplicity of the recipe, the end result is a treat that looks and tastes like it was bought from a specialty store. The vibrant colors and smooth textures of the Smoothie Pops are sure to impress both kids and adults alike.
Ingredients
- 1 cup frozen mixed berries
- 1/2 cup plain yogurt (any type, e.g., Greek, coconut, or soy)
- 1/2 cup milk (dairy or non-dairy, such as almond or soy milk)
- 1 tablespoon honey or maple syrup (optional)
- 1/2 teaspoon vanilla extract
- Ice cubes (as needed)
- Popsicle sticks or handles
- Popsicle molds (any shape or size)
Instructions
- Step 1: Begin by preparing your ingredients. If using frozen fruits, make sure they are partially thawed to blend smoothly. Measure out your yogurt, milk, honey or maple syrup (if using), and vanilla extract.
- Step 2: In a blender, combine the partially thawed fruits, yogurt, milk, honey or maple syrup, and vanilla extract. Blend the mixture on high speed until it is smooth and creamy, stopping to scrape down the sides of the blender as needed.
- Step 3: Taste the mixture and adjust the sweetness or consistency as needed. If it’s too thick, add a little more milk. If it’s not sweet enough, add a bit more honey or maple syrup.
- Step 4: Pour the smoothie mixture into popsicle molds, leaving about 1/4 inch of space at the top. Insert a popsicle stick or handle into each mold and place them in the freezer.
- Step 5: Freeze the Smoothie Pops for at least 4-5 hours or overnight. Once frozen solid, remove them from the molds and serve immediately. You can store any leftovers in an airtight container in the freezer for up to 3 months.
Handy Tips
- For a creamier pop, use more yogurt or add a banana to the blend.
- Experiment with different combinations of fruits and yogurts to create unique flavors.
- Consider adding a handful of spinach or kale for a green smoothie pop packed with nutrients.
- Always supervise children when they’re eating popsicles, especially if they’re young, to avoid choking hazards.
Heat Control
Since Smoothie Pops are frozen treats, there’s no need to worry about heat control. However, if you’re blending hot ingredients (like freshly made fruit purees), make sure they’ve cooled down to room temperature before freezing to avoid the formation of ice crystals and to ensure the popsicles freeze evenly.
Crunch Factor
Smoothie Pops are designed to be smooth and creamy. If you prefer a bit of crunch, you can add some granola, chopped nuts, or even a spoonful of peanut butter to the mixture before freezing. This will give your popsicles a nice texture contrast.
Pro Kitchen Tricks
- Use silicon popsicle molds for easy removal of the frozen treats.
- Run the molds under warm water for a few seconds to help release the popsicles if they stick.
- For a layered effect, freeze the popsicles in a few stages, adding different colors or ingredients between each freezing session.
Storage Tips
- Store Smoothie Pops in an airtight container in the freezer to maintain their texture and prevent freezer burn.
- Label the container with the date and ingredients used, especially if you’re making different flavors.
- When serving, consider dipping the tips of the popsicles in melted chocolate or yogurt for an extra-special treat.
Gift Packaging Ideas
If you’re looking to give Smoothie Pops as a gift, consider packaging them in decorative paper bags or wrapping them individually in plastic wrap or aluminum foil. You can also include a few sticks and a note with the ingredients and freezing instructions for the recipient to enjoy at home.
Flavor Variations
- Mango Peach: Blend mango, peaches, yogurt, and a hint of cinnamon for a sweet and spicy pop.
- Tropical Temptation: Combine pineapple, coconut milk, and a splash of lime juice for a refreshing and creamy treat.
- Berry Bliss: Mix different types of berries (strawberries, blueberries, raspberries) with a bit of lemon juice and honey for a classic and tangy flavor.
Troubleshooting
- Texture problems: If your Smoothie Pops are too icy, try adding more yogurt or a banana to the blend. If they’re too soft, freeze them for a longer period or add less milk.
- Ingredient replacements: Feel free to substitute different types of milk, yogurts, or fruits to suit dietary needs or preferences.
- Over/undercooking signs: Since these are frozen treats, there’s no risk of overcooking. However, under-freezing can result in popsicles that are too soft. Always check the consistency before serving.
FAQs
- Can I freeze it? Yes, Smoothie Pops are meant to be frozen. They can be stored in the freezer for up to 3 months.
- Is it gluten-free? Yes, as long as you use gluten-free ingredients, Smoothie Pops are naturally gluten-free.
- Can I double the recipe? Absolutely. Simply multiply all the ingredients and proceed with the instructions. You might need to blend the mixture in batches depending on the size of your blender.
Conclusion
Smoothie Pops are a fun, healthy, and customizable treat that’s perfect for after-school snacks, parties, or even as a quick breakfast on-the-go. With their endless flavor possibilities and ease of preparation, they’re sure to become a favorite in your household. Don’t be afraid to experiment with different ingredients and combinations to create your own unique flavors. Share your creations with friends and family, and enjoy the joy of watching your kids (or kids at heart) savor these delicious and refreshing treats.
Smoothie Pops: Healthy After-School Treats
A refreshing, healthy, and fun treat made by blending fruits, yogurts, and a touch of honey, then freezing the mixture in popsicle molds.
🥘 Ingredients
👩🍳 Instructions
-
1Prepare ingredients by partially thawing frozen fruits and measuring out yogurt, milk, honey or maple syrup, and vanilla extract.
-
2Blend the mixture on high speed until smooth and creamy.
-
3Taste and adjust sweetness or consistency as needed.
-
4Pour the smoothie mixture into popsicle molds and freeze for at least 4-5 hours or overnight.
-
5Remove from molds and serve immediately. Store leftovers in an airtight container in the freezer for up to 3 months.