Oreo Icebox Cake
Introduction
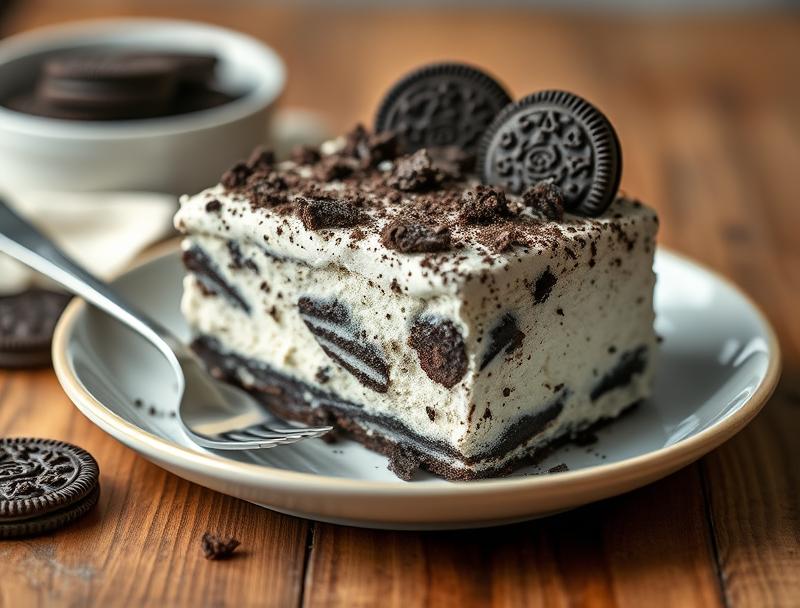
The Oreo Icebox Cake is a delightful dessert that combines the simplicity of everyday ingredients with the creativity of a layered masterpiece. This no-bake cake is perfect for those who want to impress their friends and family without spending hours in the kitchen. With its rich, chocolatey flavor and creamy texture, this cake is sure to be a hit at any gathering. The best part? It’s incredibly easy to make, requiring only a few ingredients and some basic assembly. Whether you’re a seasoned baker or a beginner, this recipe is sure to become a favorite.
Why This Works
- The combination of Oreos, cream cheese, and whipped cream provides a perfect balance of flavors and textures, making each bite a delight.
- The ease of preparation is unparalleled, as this cake requires no baking and can be assembled in just a few minutes.
- The impressive results belie the minimal effort required, making this cake perfect for special occasions or everyday treats.
Ingredients
- 1 package of Oreos (36 cookies)
- 1 block of cream cheese (8 oz)
- 1 can of sweetened condensed milk (14 oz)
- 1 cup of heavy whipping cream
- 1 teaspoon of vanilla extract
- 1/4 teaspoon of salt
- 1 cup of powdered sugar
Instructions
- Step 1: Begin by preparing your ingredients. Crush 24 of the Oreos in a food processor or place them in a plastic bag and crush them with a rolling pin. Set aside.
- Step 2: In a large mixing bowl, combine the cream cheese, sweetened condensed milk, vanilla extract, and salt. Mix until smooth and creamy.
- Step 3: In a separate bowl, whip the heavy whipping cream until stiff peaks form. Add the powdered sugar and mix until combined. Fold the whipped cream into the cream cheese mixture until well combined.
- Step 4: To assemble the cake, start with a layer of crushed Oreos. You can use a 9×13 inch pan or a springform pan for this. Next, add a layer of the cream cheese mixture, followed by a layer of whole Oreos. Repeat this process two more times, ending with a layer of crushed Oreos on top.
Handy Tips
- Make sure to chill the cake in the refrigerator for at least 4 hours before serving to allow the flavors to meld together.
- If you want a stronger Oreo flavor, you can use more Oreos or add some Oreo crumbs to the cream cheese mixture.
- To ensure the cake sets properly, don’t overmix the cream cheese mixture, and make sure the whipped cream is stiff before folding it in.
Heat Control
Since this cake is no-bake, there’s no need to worry about heat control. However, it’s essential to chill the cake in the refrigerator to allow the flavors to meld together and the cake to set properly.
Crunch Factor
The crunch factor in this cake comes from the Oreos, which provide a nice texture contrast to the creamy filling. To achieve the perfect crunch, make sure to crush the Oreos just before using them, and don’t overmix the cream cheese mixture, which can cause the Oreos to become soggy.
Pro Kitchen Tricks
- To ensure the cake sets properly, make sure the cream cheese is at room temperature before mixing it with the sweetened condensed milk.
- If you’re having trouble getting the whipped cream to stiffen, try chilling the bowl and beaters in the freezer for a few minutes before whipping.
- To add some extra flavor to the cake, you can drizzle it with chocolate sauce or sprinkle some chopped nuts on top.
Storage Tips
- The cake can be stored in the refrigerator for up to 3 days.
- Make sure to cover the cake with plastic wrap or aluminum foil to prevent it from drying out.
- If you want to freeze the cake, you can do so for up to 2 months. Simply thaw it in the refrigerator overnight before serving.
Gift Packaging Ideas
This cake is perfect for gift-giving, especially during the holidays. You can package it in a decorative tin or a gift box, or even make individual servings in small jars or containers. Simply wrap the container in plastic wrap or aluminum foil and add a ribbon or gift tag.
Flavor Variations
- Try using different flavors of Oreos, such as mint or peanut butter, to give the cake a unique twist.
- Add some chopped nuts or chocolate chips to the cream cheese mixture for added flavor and texture.
- Use different types of milk, such as almond or soy milk, to make the cake dairy-free.
Troubleshooting
- If the cake doesn’t set properly, it may be because the cream cheese mixture was overmixed or the whipped cream wasn’t stiff enough.
- If the cake is too dry, it may be because the Oreos were crushed too finely or the cream cheese mixture was overmixed.
- If the cake is too soggy, it may be because the Oreos were crushed too coarsely or the whipped cream was too runny.
FAQs
- Can I freeze it? Yes, you can freeze the cake for up to 2 months. Simply thaw it in the refrigerator overnight before serving.
- Is it gluten-free? No, this cake is not gluten-free, as it contains Oreos, which contain gluten.
- Can I double the recipe? Yes, you can double the recipe to make a larger cake. Simply multiply all the ingredients by two and assemble the cake as instructed.
Conclusion
The Oreo Icebox Cake is a delicious and easy-to-make dessert that’s perfect for any occasion. With its rich, chocolatey flavor and creamy texture, this cake is sure to be a hit with your friends and family. Whether you’re a seasoned baker or a beginner, this recipe is sure to become a favorite. So go ahead, give it a try, and enjoy the oohs and aahs from your loved ones!
Oreo Icebox Cake
A no-bake dessert made with Oreos, cream cheese, and whipped cream, perfect for special occasions or everyday treats.
🥘 Ingredients
👩🍳 Instructions
-
1Crush 24 Oreos in a food processor or place them in a plastic bag and crush them with a rolling pin.
-
2In a large mixing bowl, combine the cream cheese, sweetened condensed milk, vanilla extract, and salt. Mix until smooth and creamy.
-
3In a separate bowl, whip the heavy whipping cream until stiff peaks form. Add the powdered sugar and mix until combined. Fold the whipped cream into the cream cheese mixture until well combined.
-
4To assemble the cake, start with a layer of crushed Oreos. Next, add a layer of the cream cheese mixture, followed by a layer of whole Oreos. Repeat this process two more times, ending with a layer of crushed Oreos on top.