Introduction
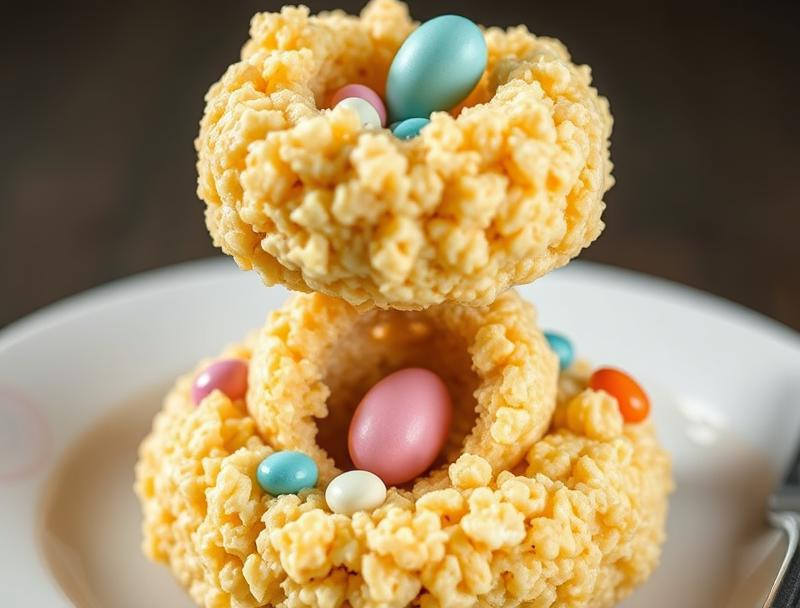
Transform humble Rice Krispies into adorable Easter nests in just 30 minutes! This recipe is perfect for busy cooks who want a delicious, impressive treat without the fuss. Skip the complicated baking and enjoy a springtime dessert that’s as cute as it is easy.
Why This Works
This recipe triumphs because of its simplicity and speed. No special equipment or baking skills are needed—just melt, mix, and mold! The classic Rice Krispie base provides a satisfying crunch, perfectly complemented by the sweetness of mini marshmallows and the festive touch of colorful candies. It’s a guaranteed crowd-pleaser for Easter gatherings or a sweet pick-me-up any day.
Key Ingredients
- 🥣 6 cups Rice Krispies cereal
- 🧈 1/2 cup unsalted butter
- 🍬 10 oz bag of mini marshmallows
- 🥚 1 cup mini chocolate eggs
- 🌈 1/2 cup assorted colorful candy
Instructions
1️⃣ Prep your workspace: Line a baking sheet with parchment paper. This prevents sticking and makes cleanup a breeze.
2️⃣ Melt the butter: In a large saucepan over low heat, melt the butter completely. Don’t rush this step—gentle melting ensures even cooking.
3️⃣ Add marshmallows: Add the mini marshmallows to the melted butter and stir constantly until completely melted and smooth. Low and slow prevents burning!
4️⃣ Incorporate cereal: Remove from heat and gently stir in the Rice Krispies cereal until evenly coated. Be careful not to overmix – a few slightly uncoated pieces add texture.
5️⃣ Shape the nests: Quickly scoop about 1/4 cup of the mixture and gently press it into a small nest shape in your hand. This is easier than you think! Set aside on the prepared baking sheet. Repeat until all the mixture is used.
6️⃣ Decorate: While the nests are still slightly warm and pliable, press mini chocolate eggs and assorted colorful candies into the center of each nest. Let cool completely.
Handy Tips
- Use a lightly oiled spoon to scoop the Rice Krispie mixture for easier handling.
- For perfectly round nests, use a small cookie scoop.
- Don’t overwork the mixture; a slightly less-than-perfect shape adds to the rustic charm!
Heat Control
Low and slow is key! Melting the marshmallows over low heat prevents scorching and ensures a smooth, creamy consistency. High heat will burn the marshmallows before they melt completely.
Crunch Factor
The crunch of the Rice Krispies is the star here! The slightly chewy marshmallows provide a delightful contrast, creating a texture that’s both satisfying and fun.
Pro Kitchen Tricks
- For extra flavor, add a teaspoon of vanilla extract to the melted marshmallows.
- Use different colored candies to match your Easter theme.
- Add a few sprinkles for extra sparkle!
Storage Tips
Store your Rice Krispie Easter nests in an airtight container at room temperature for up to 3 days. They’re best enjoyed fresh, but they’ll still be delicious the next day.
Gift Packaging Ideas
Place individual nests in small cellophane bags tied with ribbon. Alternatively, arrange them in a pretty basket lined with Easter grass for a delightful presentation.
Flavor Variations
🌟 Peanut Butter Delight: Stir in 1/4 cup of creamy peanut butter with the melted marshmallows.
🌟 Coconut Craze: Add 1/2 cup of shredded sweetened coconut to the Rice Krispie mixture.
🌟 Fruity Fun: Incorporate 1/2 cup of dried fruit (cranberries, chopped apricots) for a burst of flavor.
🌟 Chocolate Heaven: Drizzle melted semi-sweet chocolate over the finished nests.
Troubleshooting
- Too sticky: If the mixture is too sticky, add a few more Rice Krispies to absorb excess moisture.
- Too dry: If the mixture is too dry and crumbly, add a teaspoon or two of melted butter.
- Nests not holding shape: Ensure the mixture is slightly warm and pliable before shaping. Let cool completely for best results.
FAQ
- Can I make these ahead of time? Yes, these nests can be made a day or two in advance and stored as directed.
- Can I use other types of cereal? While Rice Krispies provide the best texture and structure, you can experiment with other crispy cereals, but results may vary.
- What if I don’t have mini chocolate eggs? Use any candy you like! Jellybeans, M&Ms, or even small gummy candies work well.
- Can I freeze these? Freezing is not recommended, as they may become soggy upon thawing.
- Are these nests gluten-free? Check the ingredients of your Rice Krispies cereal to verify.
Conclusion
These quick and easy Rice Krispie Easter nests are the perfect springtime treat! They’re fun to make, even more fun to eat, and guaranteed to impress your family and friends. Share your creations with us on social media – we can’t wait to see your adorable nests!
5-Minute Easter Rice Krispie Nests: No-Bake Bunny Bliss
Delightful and easy-to-make Rice Krispie nests perfect for Easter, filled with candy eggs and made in just 5 minutes.
Ingredients
- 3 cups Rice Krispies cereal
- 1 cup mini marshmallows
- 3 tablespoons butter
- 1/2 teaspoon vanilla extract
- Chocolate eggs or jelly beans for decoration
Instructions
- In a large microwave-safe bowl, melt the butter and mini marshmallows together in the microwave for about 30 seconds, stirring until smooth.
- Add the vanilla extract and Rice Krispies to the melted mixture; stir until fully combined.
- Scoop the mixture into a greased muffin tin and press down in the center to create a nest shape.
- Allow the nests to cool for a few minutes, then remove them from the muffin tin.
- Fill each nest with chocolate eggs or jelly beans to decorate.
Tips
- For a chocolatey twist, add cocoa powder to the melted marshmallow mixture.
- Use different colored candy eggs to make the nests more festive.